Listening to a RFM69 Radio with Python
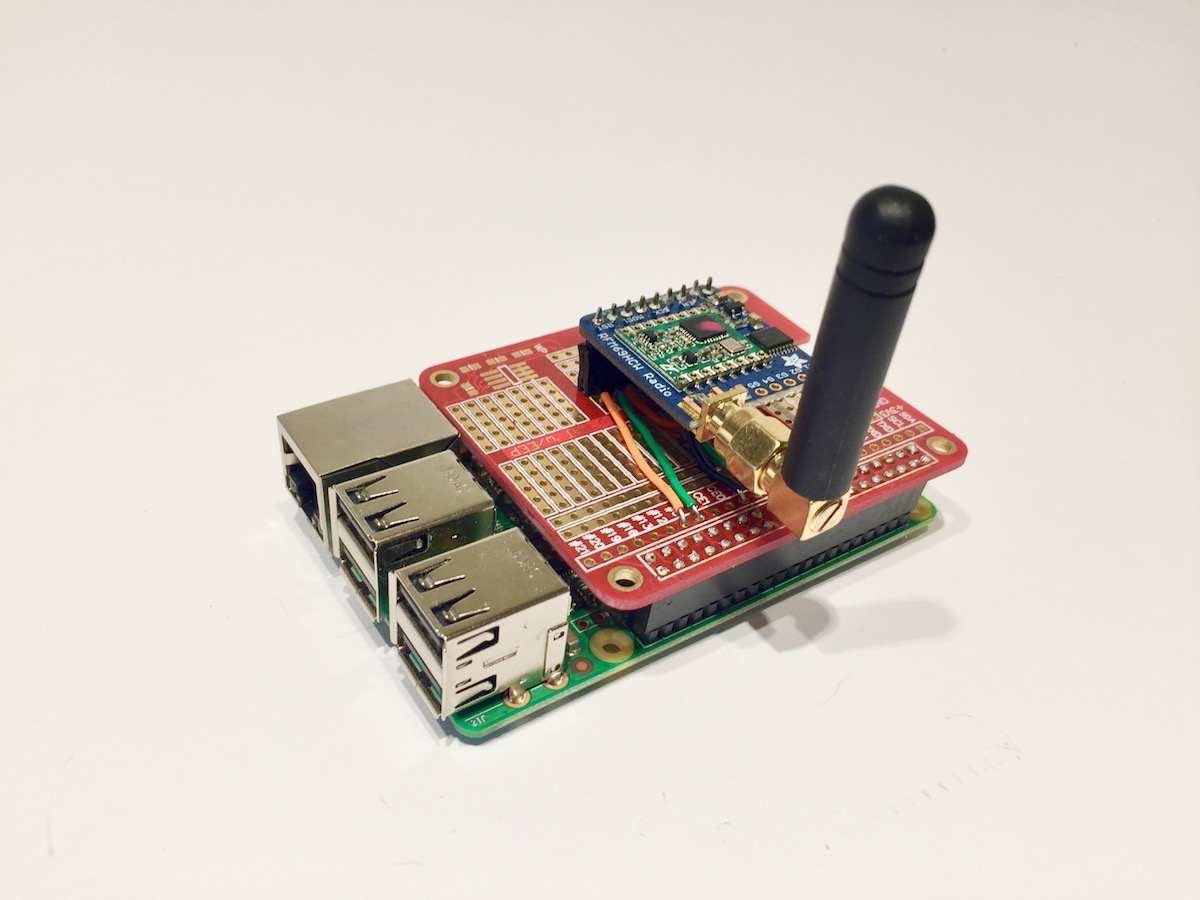
This post follows on from my last post on how to connect a RFM69 radio module directly to a Raspberry PI (RPI).
So, we have a radio (RFM69HCW) connected to a RPI and we want to listen for incoming messages and then act on them, performing some task. In this post we are going to look at how you can forward messages from an RFM69 network to a RESTful API. HTTP requests can be slow and we need to consider how to manage possible delays. If we block the radio receiver loop while making the necessary HTTP request, then time critical messages will be forced to wait!
We could solve this problem in a number of ways. In this post we are going to use Asyncio. It’s worth mentioning here that although Asyncio is often touted as the wonder child of Python 3, asynchronous processing is not new to Python. More importantly, Asyncio is not a silver bullet and depending on your task may not be the best solution. I am not going to go over old ground talking about the pros and cons of async vs sync or concurrency and parallelism, Abu Ashraf Masnun has a nice article called Async Python: The Different Forms of Concurrency which I think covers this topic well.
Having said this, the task of forwarding messages to an API is a good fit for Asyncio and it is also a good excuse to play with some cool new libraries. We will get on to them later, but first we need to prepare our RPI.
Prepare the Raspberry Pi
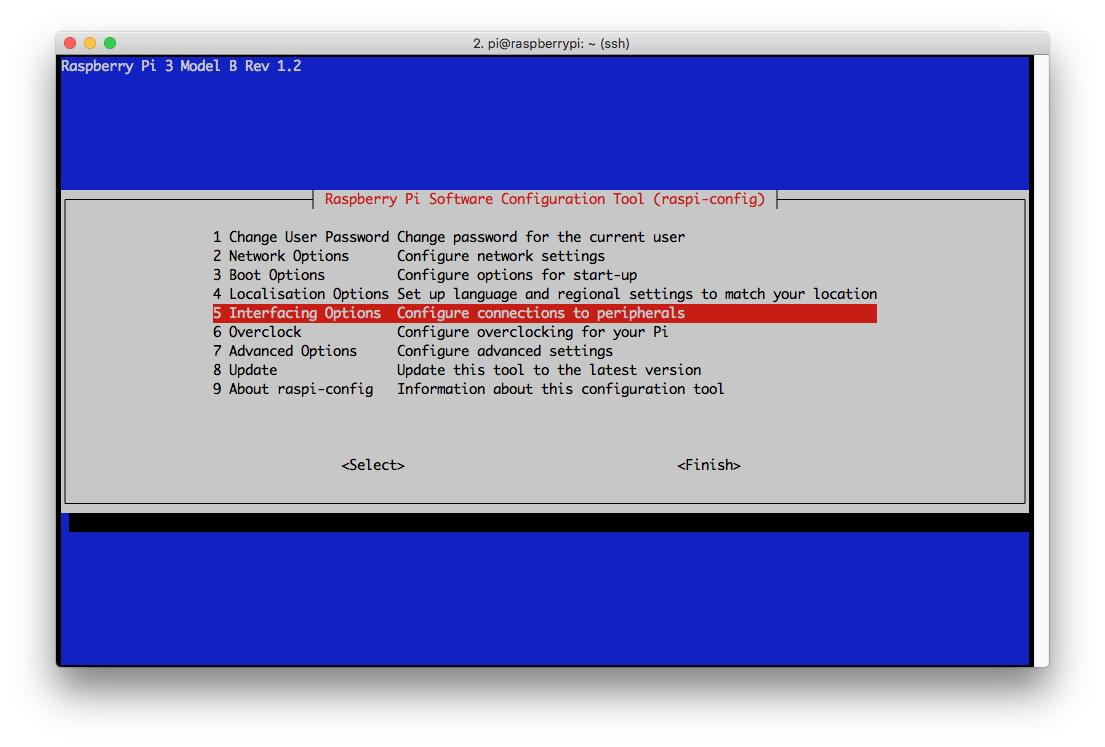
The first thing we need to do is make sure SPI and GPIO access is enabled on our RPI. To do this, open a terminal, SSH into the RPI:
ssh pi@raspberrypi.local
and open the configuration tool:
sudo raspi-config
From the menu select “Interface options” and then using the sub-menu enable “SPI” and “Remote GPIO”.
Prepare a sensor node
In order to test the radio we need a companion sensor node to transmit and receive data. I am going to use an Adafruit RFM69 Feather, but the code can easily be adapted to other board types.
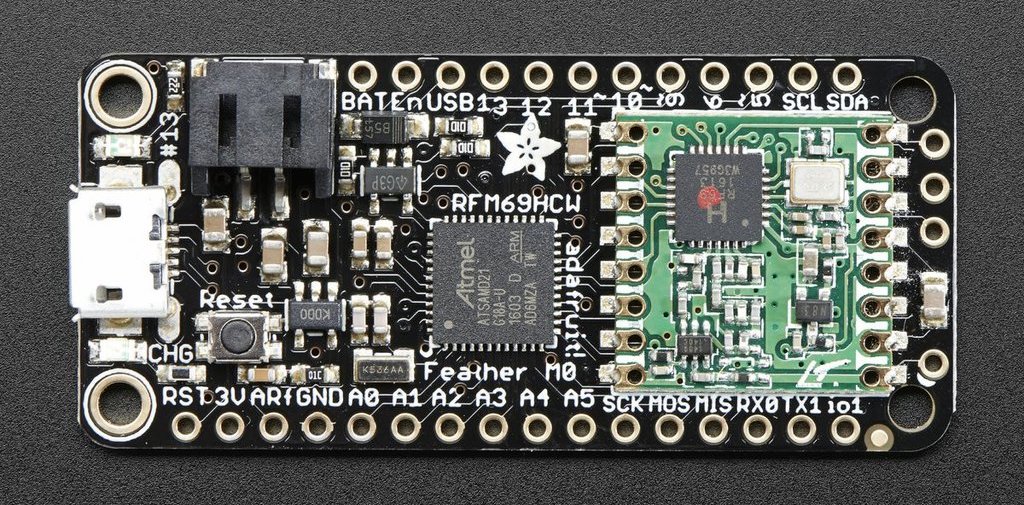
You will need to install LowPowerLabs’ RFM69 library. Details of how to do this can be found in their Github repository’s readme file.
Next, grab my example node code and upload it to your Feather. This code will periodically send messages to the node with an ID of 1 and listen out for messages sent to Node 2.
Raspberry Pi RFM69 Test Code
Finally we can test our hardware! SSH into your RPI and if you are using a virtual environment then activate it and install the RFM69Radio library:
pip install rpi-rfm69
This is a library I created and is largely based on the work of Eric Trombly, who created a Python port of the LowPowerLabs RFM69 C library. All I have tried to do is make the API more Pythonic. Here is a small test script for receiving and sending data, upload and tun it on your RPI.
from RFM69 import Radio, FREQ_433MHZ
import datetime
import time

node_id = 1
network_id = 100
recipient_id = 2

with Radio(FREQ_433MHZ, node_id, network_id, isHighPower=True, verbose=True) as radio:
    print ("Starting loop...")

    rx_counter = 0
    tx_counter = 0

    while True:

        # Every 10 seconds get packets
        if rx_counter > 10:
            rx_counter = 0

            # Process packets
            for packet in radio.get_packets():
                print (packet)

        # Every 5 seconds send a message
        if tx_counter > 5:
            tx_counter=0

            # Send
            print ("Sending")
            if radio.send(2, "TEST", attempts=3, waitTime=100):
                print ("Acknowledgement received")
            else:
                print ("No Acknowledgement")


        print("Listening...", len(radio.packets), radio.mode_name)
        delay = 0.5
        rx_counter += delay
        tx_counter += delay
        time.sleep(delay)
Hopefully at this point you are seeing packets from the sensor node scrolling past.
Building an RFM69 to RESTful API Gateway
As I mentioned, we are using Asyncio (introduced in Python 3.5) to interleave processing tasks with listening to the radio. To do this we need an asynchronous HTTP client. Once again the Talk Python Podcast comes to the rescue - in an interview with Pawel Miech the aiohttp library was brought to my attention. Using this library in combination with RFM69Radio gives us:
import asyncio
from aiohttp import ClientSession
from RFM69 import Radio, FREQ_433MHZ

async def call_API(url, packet):
    async with ClientSession() as session:
        print("Sending packet to server")
        async with session.post(url, json=packet.to_dict('%c')) as response:
            response = await response.read()
            print("Server responded", response)

async def receiver(radio):
    while True:
        print("Receiver")
        for packet in radio.get_packets():
            print("Packet received", packet.to_dict())
            await call_API("http://httpbin.org/post", packet)
        await asyncio.sleep(10)

async def send(radio, to, message):
    print ("Sending")
    if radio.send(to, message, attempts=3, waitTime=100):
        print ("Acknowledgement received")
    else:
        print ("No Acknowledgement")

async def pinger(radio):
    print("Pinger")
    counter = 0
    while True:
        await send(radio, 2, "ping {}".format(counter))
        counter += 1
        await asyncio.sleep(5)


loop = asyncio.get_event_loop()
node_id = 1
network_id = 100
with Radio(FREQ_433MHZ, node_id, network_id, isHighPower=True, verbose=False) as radio:
    print ("Started radio")
    loop.create_task(receiver(radio))
    loop.create_task(pinger(radio))
    loop.run_forever()

loop.close()
The destination url is set to http://httpbin.org/post. This is a free online service which will echo back the post data sent to the service. It has a whole host (pardon the pun) of other tools for testing HTTP clients.
So let’s get this up and running. First off, we need to install the necessary libraries.
pip install rpi-rfm69
pip install aiohttp
pip install cchardet
pip install aiodns
pip install spidev
pip install RPi.GPIO
as a one liner:
pip install rpi-rfm69 aiohttp cchardet aiodns spidev RPi.GPIO
Navigate to where you want to run the code and create a new Python file and copy and paste the code above. Alternatively you can run the following commands to copy it from my snippets.
pip install getgist
getgist jkittley rfm69_async_rxtx.py
Finally, run the command below to execute the script.
python rfm69_async_rxtx.py